All posts in “Software”

Hvorfor DR’s streaming ikke retfærdiggør medielicens

This is going to be in Danish.

Inden DR’s medielicens kunne danske borgere se DR’s programmer gratis (og lovligt) vha. en tuner i deres pc. Dette satte Brian Mikkelsen en stopper for i 2006, da han fremlagde et medieudspil, der lagde op til, at alle apparater, der kunne gengive lyd og billedprogrammer, skulle gøres licenspligtige. Dette blev bl.a. gjort for at fremtidssikre licensbegrebet, da planen var, at en væsentlig del af licensmidlerne fremover skulle bruges til at gøre indhold tilgængeligt over internettet. Medielicensen forpligtede dog ikke DR til at udvide deres serverkapacitet, og det lider vi nu, små fire år senere, under, hvilket jeg ville give et eksempel på i dette indlæg.

En lang række af DR’s programmer kan rigtig nok streames på dr.dk, men kvaliteten er så ringe, at det på ingen måde kan betale sig. Lad os tage et kig på “Det Nye Talkshow”. Streamer man programmet i såkaldt “høj kvalitet”, får man følgende:
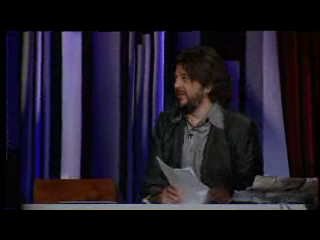
“Det Nye Talkshow” streamet i “høj kvalitet”.

Ikke nok med at kvaliteten er skræmmende lav (478 x 359 pixels), så har DR sjovt nok også valgt at ændre formatforholdet til 4:3 ved at indsætte sorte bjælker (letterboxing), hvilket medfører at videoen set i fuld skærm på en widescreen-monitor vil være centreret med sorte bjælker hele vejen rundt. Det er ren dovenskab.

Jeg valgte tilfældigvis også at hente et afsnit af programmet via iTunes, hvor det også er tilgængeligt. Her er det downloadede resultat sjovt nok anderledes:
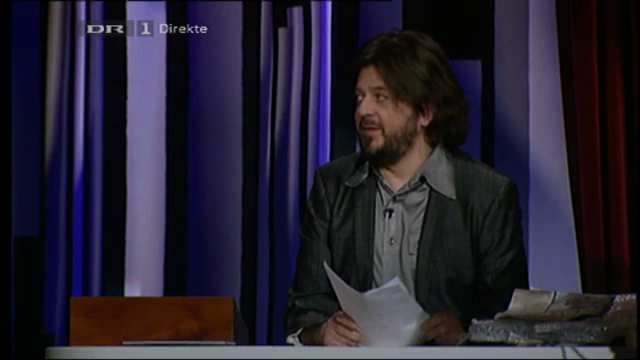
“Det Nye Talkshow” hentet fra iTunes. (Tryk for at se billede i fuld størrelse.)

Her er kvaliteten sjovt nok betydeligt bedre med en opløsning på 640 x 360 og det oprindelige formatforhold er bibeholdt. Én ting er at lægge en lavkvalitets-version op til streaming, en anden er samtidig at tilbyde en langt bedre version andetsteds uden at nævne det på programmets hjemmeside. Uanset er begge udgaver af så lav kvalitet, at medielicensen er en farce.

DR’s hykleri stopper dog ikke her. På hjemmesiden for DR’s HD-kanal står følgende:

“DR’s HD-kanal samsendes/streames ikke på dr.dk, da den desvære ikke kan udsendes på nettet i ægte HD-kvalitet.”

Hvilket naturligvis er klart, hvis man bruger licenspengene på Emmy-fester i stedet for nye servere.
Jailbreaking my iPhone

I’ve recently started considering jailbreaking my iPhone because I’ve started getting these spam calls from Somalia – sometimes 15 calls per night – and I know that there’s a jailbreak app which makes it possible to block calls. So, after stumbling upon an extremely simple jailbreaking guide, I went ahead and followed it, thinking I could always just restore my iPhone if something got messed up.

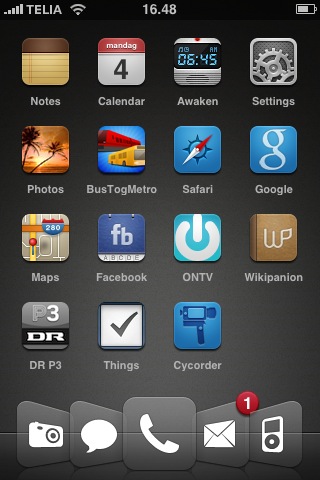
First of, the jailbreaking process itself is incredibly easy, it probably took less than 60 seconds. Then I started exploring the new world of Cydia, an application which makes it possible to download other applications for jailbroken iPhones and iPod Touches. It looks very similar to the official App Store, i.e. you find an app and press download. After surfing various sites for neat apps, I now use the following:

Winterboard

This app manages the themes you are using, I settled on Matte Nano and Glasklart, as seen in this screenshot:

photo 2

Backgrounder: This simply lets applications run in the background.

Cycorder: A video-recording app. I haven’t tested the quality yet.

CyDelete: Makes it possible to delete Cydia apps without opening the Cydia app itself.

Five Icon Dock: Makes it possible to have 5 apps in the dock.

iBlacklist: This app blocks incoming text messages and phone calls, bye, bye, African spammers.

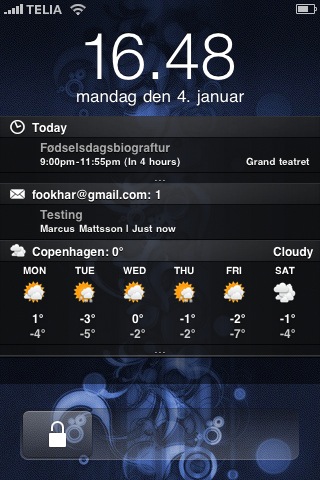
LockInfo: Customizes the lock screen, as seen in this screenshot:

photo
I still need to find a better wallpaper, but this app is amazing.

OpenSSH: Makes it possible to use SSH to transfer files (themes and icons for example) from your computer to the iPhone.

SBSettings: Very useful app which is accessible from anywhere on the phone. You just slide your finger on the status bar and a GUI drops down making it possible to enable/disable 3G, WiFi, Bluetooth, etc. on the fly.

And that’s it for now. At the moment I’m kind of confused why I didn’t do this a year ago. Oh, well.

Right Vision: Utilizing Optical Flow to Prevent Right Turn Accidents

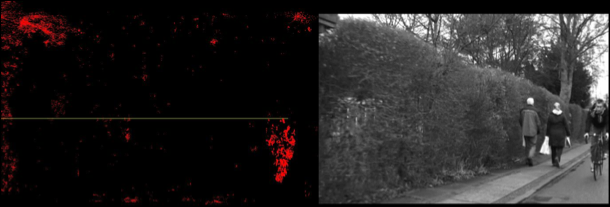
Oh boy, this is going to get geeky. Today, me and my group finished our 3rd semester project after three months of very hard work. The semester theme was Human Senses – Digital Perception, and was mainly focused on using computer vision. We ended up creating a cyclist protection system, which can detect a cyclist in a right turn situation and warn the driver. The system is implemented in C++ using Intel’s computer vision library, OpenCV, for various image processing functions. Basically, the system, called Right Vision, estimates what is called optical flow (the apparent motion of objects, surfaces and edges) and performs segmentation based on objects’ and the background’s vanishing points to detect a cyclist from a dynamic video feed mounted on a moving car.

Screen shot 2009-12-17 at Thu, Dec 17, 2009 1Estimating right-to-left movements.

This semester at Medialogy was the first in which I really felt that I learned something useful. I have always wanted to learn C++ and learning how to implement various image processing techniques such as thresholding, edge detection and compound operations at the same time was very effective.

The entire project ended with a 97 page report, which can be downloaded here.

Image Processing and Motion Tracking

One month into the 3rd semester, and I finally feel like I’m learning something useful. We’ve had a lot of programming classes, focusing on C++ and OpenCV, a computer vision library focusing on real-time image processing. The point of all this is to learn how to make tracking systems (think the big screen from Minority Report) and today we finally got a first, practical look at how to apply all of this.

jonas_motion

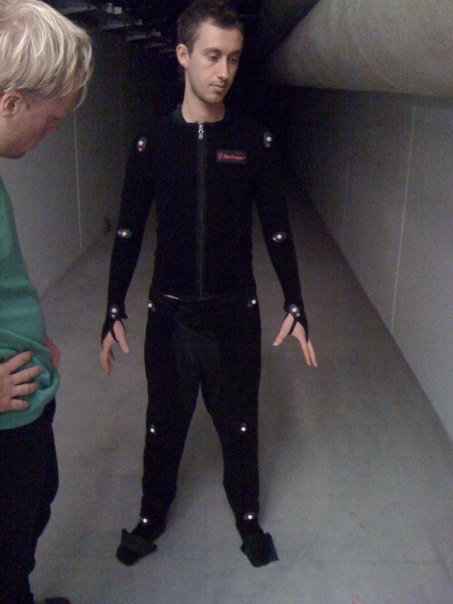
Jonas in the hot motion tracking suit.

Most people have probably seen this in behind the scenes videos from movies and computer games (this is a simple version of how they made Gollum). The procedure is simple: you adjust the aperture, shutter speed, lighting settings, etc. until all you see are the suit’s tracking points in the dark. Using an infrared camera makes it easier, but this was only a test. But then you have to track the points, and this is where image processing comes in.

Screen shot 2009-10-05 at Mon, Oct 5, 2009

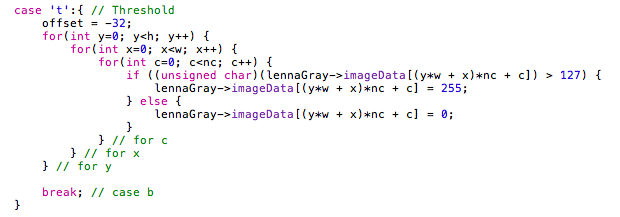
Excerpt from the source code (turning a grayscale image into a binary image).

Now you have to isolate and track the interesting points (called blobs), in this case the reflective buttons, by applying some image processing techniques. First, you turn the color image/video into grayscale with a built-in function in OpenCV, and then you convert it to binary, which means that we only get two colors in the image: black (0) and white (255). To convert the video images we make all pixel values above or equal to some threshold (235, in this case) white and all below black.

The original video.

The video converted to binary.

The reason for doing this is, as mentioned, that we want to be able to track something, so we have to remove noise, i.e. stuff we don’t want to track. In this case we want everything but the reflective buttons to be black, so we apply the steps above. As you can see in the last video, there’s still a lot of noise (light at the edge of the screen, Jonas’ face and hands when he gets close, etc.), but in the middle of the video we have a sequence with a “clean” region, where most noise around Jonas’ reflective buttons are gone. Then we can start tracking. However, we will remove more noise by applying various techniques (mean filter, dilation, etc.) first, but that’s for another post.


My Firefox Search Keywords

The Search Keywords feature in Firefox makes it possible to use search engines by starting a search string with a certain letter, in the address bar. For example “i die hard” searches for “die hard” on IMDb, in my browser. Search Keywords are organized as bookmarks, and can be added by right-clicking a search field, and pressing “Add a Keyword for this Search”. I use this feature for all searches, and I’m bored, so here’s my list of Search Keywords.

You install it like this:

  1. Right-click on my Search Keywords bookmarks file and choose “Save Link As…” Place the file somewhere on your computer.
  2. In Firefox, from the Bookmarks menu, choose “Manage Bookmarks”.
  3. From the Bookmarks Manager File menu, choose Import. Choose “Import Bookmarks from File.” Browse to and open the file you just saved.

You can see an explanation of all the keywords by left-clicking the link.